

Import Sage
Description
Section titled “Description”Imports Sage Intacct account balances by dimension over a Sage connection (Intacct’s get_accountbalancesbydimensions), bounded by a date range and an account range, with the dimensions you select carried onto each row. The result is a trial balance: one row per account per dimension combination, carrying an opening (startbalance), period (periodbalance), and ending (endbalance) balance.
Use this for a trial balance or a balances-based P&L. The Statistical control (below) also reaches Intacct’s non-monetary statistical accounts — headcount, square footage, units — so a single step can pull financial balances, statistical balances, or both, letting you build per-unit metrics without a separate export. For transaction-level general ledger detail, use Import Sage Intacct Query against GLDETAIL; for an ad-hoc query against any Intacct object, use the same step with your object name.
Unique Configuration Items
Section titled “Unique Configuration Items”Source and Target
Section titled “Source and Target”- Connection — the Sage connection to read through.
- Company — the Sage company to read from.
Data Selection
Section titled “Data Selection”- Start date / End date — the period the balances are reported over (both are required; a lone start or end date is ignored).
- Start account / End account — the account-code range to include. Use
0000and9999to cover every account regardless of number — the usual choice when Statistical below is set to pull statistical accounts, since Intacct’s statistical accounts aren’t guaranteed to sit inside your financial chart’s numbering. - Statistical — which kind of account balances the pull returns:
- Financial only (exclude statistical) — returns only financial account balances (the normal trial-balance pull). This is the default.
- Financial + statistical — returns financial and statistical account balances together in the same result.
- Statistical only — returns only statistical account balances: headcount, square footage, units, and any other non-monetary accounts your Intacct chart tracks alongside the financial one.
- Entities — the Sage entities to include.
- Dimensions — switch on the dimensions you want as columns: class, contact, cost type, customer, department, employee, item, location, project group, task, and vendor.
- Custom dimensions — any additional user-defined dimensions to carry through.
Common Configuration Items
Section titled “Common Configuration Items”Target Table
The target selection for imports is limited to tables only since views do not contain underlying data.
Dynamic Option
The Dynamic option allows specification of a table using text, including variables. This is useful when employing variable driven workflows where table and view references are relative to the variables specified.
An example that uses the current_month variable to dynamically point to target table:
legal_entity/inputs/{current_month}/ledger_valuesStatic Option
When a specific table is desired as the target for the import, leave the Dynamic box unchecked and select the target Table.
If the target Table does not exist, select the Create new table button to create the table in the desired location.
Table Explorer is always avaible with any table selection. Click on the Table Explorer button to the right of the table selection and a Table Explorer window will open.
Data Mapper Configuration
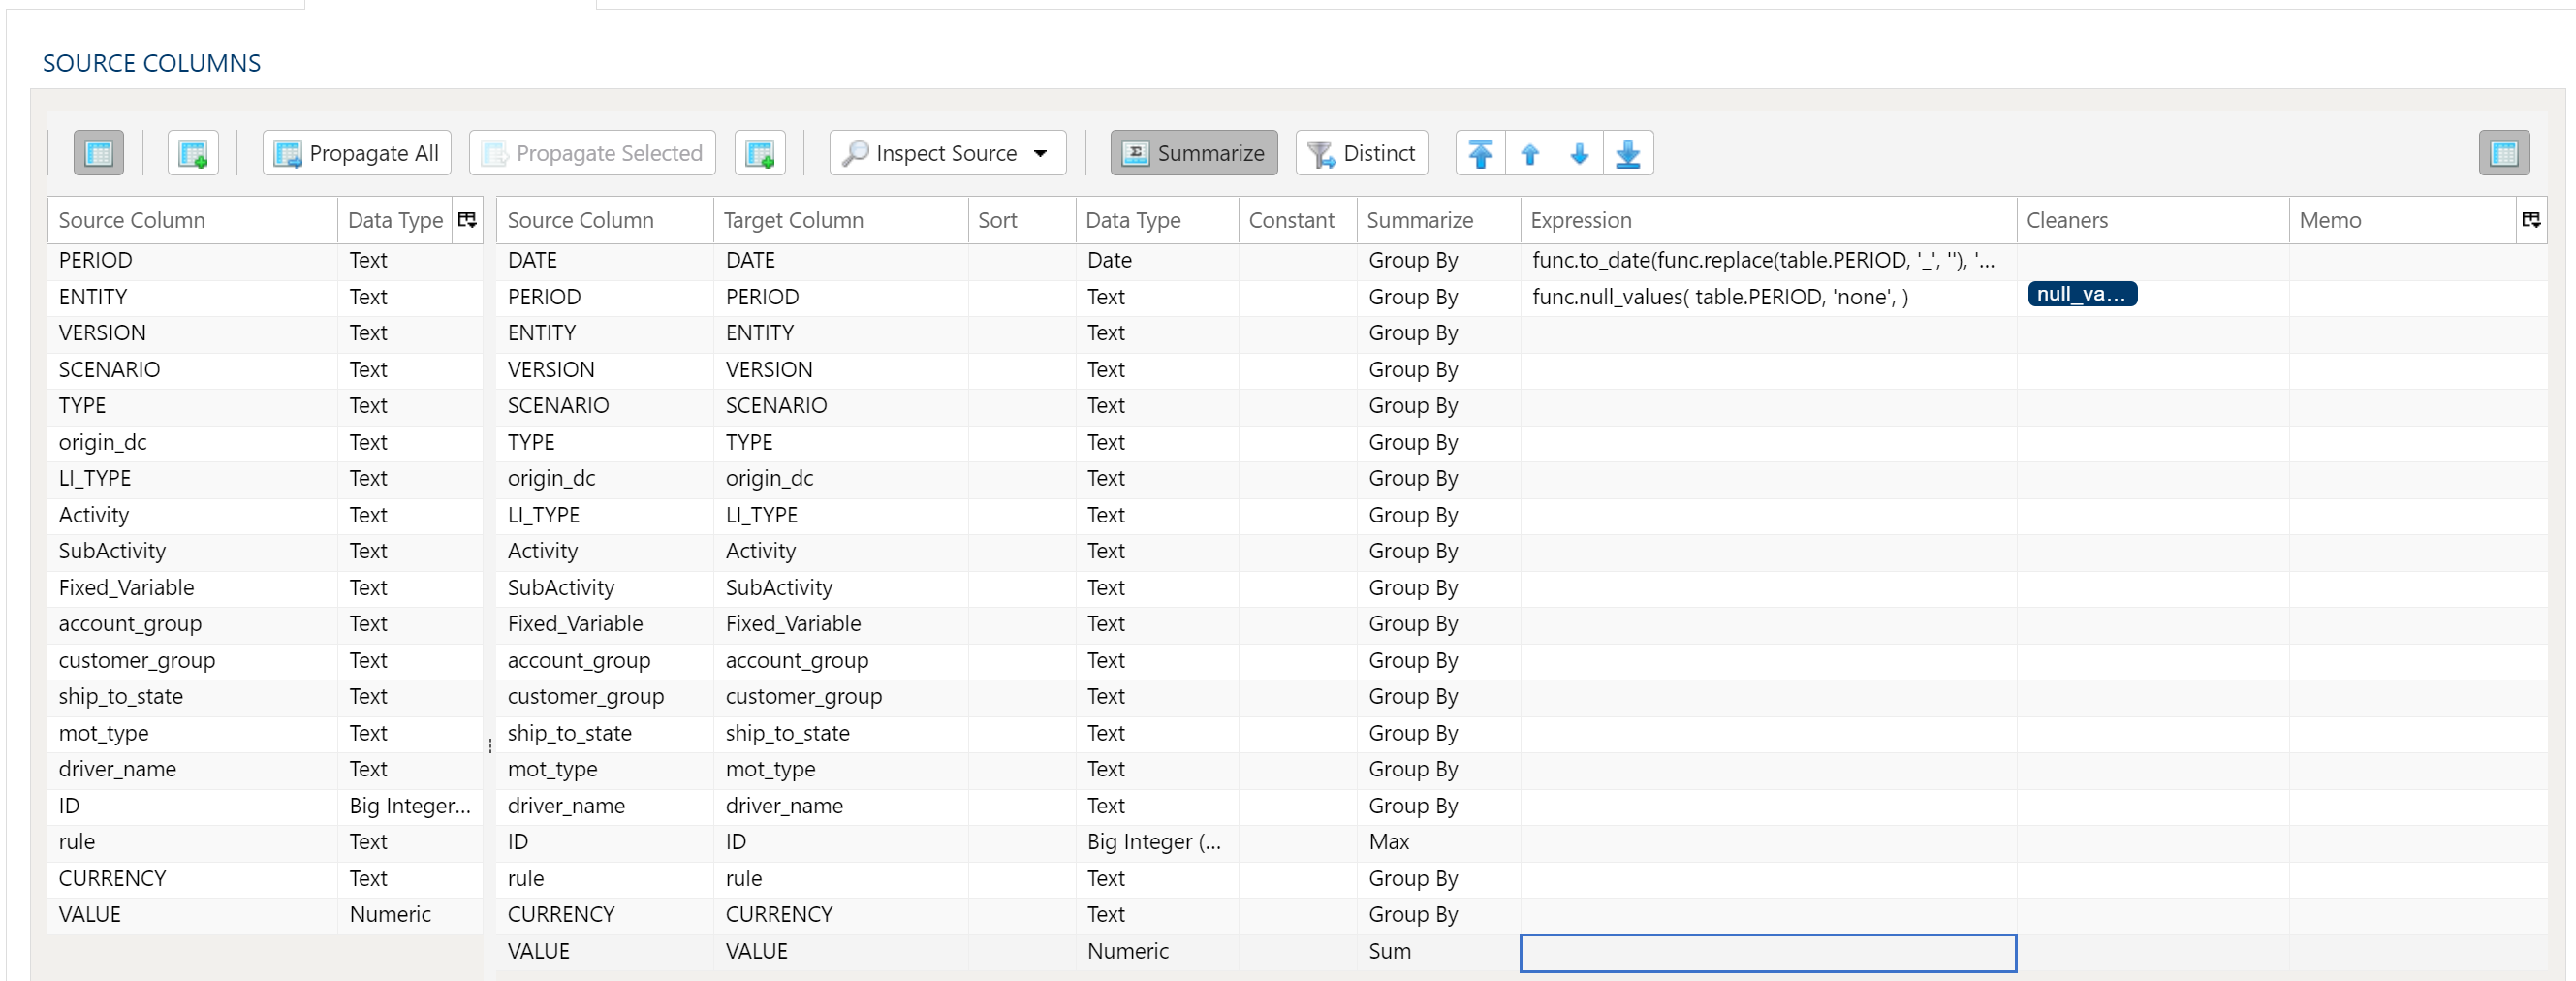
The Data Mapper is used to map columns from the source data to the target data table.
Inspection and Populating the Mapper
Using the Inspect Source menu button provides additional ways to map columns from source to target:
- Populate Both Mapping Tables: Propagates all values from the source data table into the target data table. This is done by default.
- Populate Source Mapping Table Only: Maps all values in the source data table only. This is helpful when modifying an existing workflow when source column structure has changed.
- Populate Target Mapping Table Only: Propagates all values into the target data table only.
If the source and target column options aren’t enough, other columns can be added into the target data table in several different ways:
- Propagate All will insert all source columns into the target data table, whether they already existed or not.
- Propagate Selected will insert selected source column(s) only.
- Right click on target side and select Insert Row to insert a row immediately above the currently selected row.
- Right click on target side and select Append Row to insert a row at the bottom (far right) of the target data table.
Deleting Columns
To delete columns from the target data table, select the desired column(s), then right click and select Delete.
Column Data Type
Every target column carries a Type. A column propagated from the source keeps the source column’s type; a row you add by hand starts as Text, and you set Type to say what it should actually be — a column you intend to sum or sort needs its numeric or date type, because text sorts and sums as text.
A step saved with a column that has no type at all still runs. The type is worked out when the step starts, from the source column that column reads. Where there is nothing to read it from, it is treated as text: an Extract SQL step’s columns come from the query you wrote rather than from a mapped source, and where several sources carry the same column name under types that disagree, text is used rather than guessing one of them — a wrong guess produces a conversion the warehouse can reject, and anything converts to text.
Setting Type yourself is still how you say what a column should be. Leaving it unset means accepting whatever the source column happens to be.
Changing Column Order
To rearrange columns in the target data table, select the desired column(s). You can use either:
- Bulk Move Arrows: Select the desired move option from the arrows in the upper right
- Context Menu: Right clikc and select Move to Top, Move Up, Move Down, or Move to Bottom.
Reduce Result to Distinct Records Only
To return only distinct options, select the Distinct menu option. This will toggle a set of checkboxes for each column in the source. Simply check any box next to the corresponding column to return only distinct results.
Depending on the situation, you may want to consider use of Summarization instead.
The distinct process retains the first unique record found and discards the rest. You may want to apply a sort on the data if it is important for consistency between runs.
Aggregation and Grouping
To aggregate results, select the Summarize menu option. This will toggle a set of select boxes for each column in the target data table. Choose an appropriate summarization method for each column.
- Group By
- Sum
- Min
- Max
- First
- Last
- Count
- Count (including nulls)
- Mean
- Standard Deviation
- Sample Standard Deviation
- Population Standard Deviation
- Variance
- Sample Variance
- Population Variance
- Advanced Non-Group_By
For advanced data mapper usage such as expressions, cleaning, and constants, please see the Advanced Data Mapper Usage
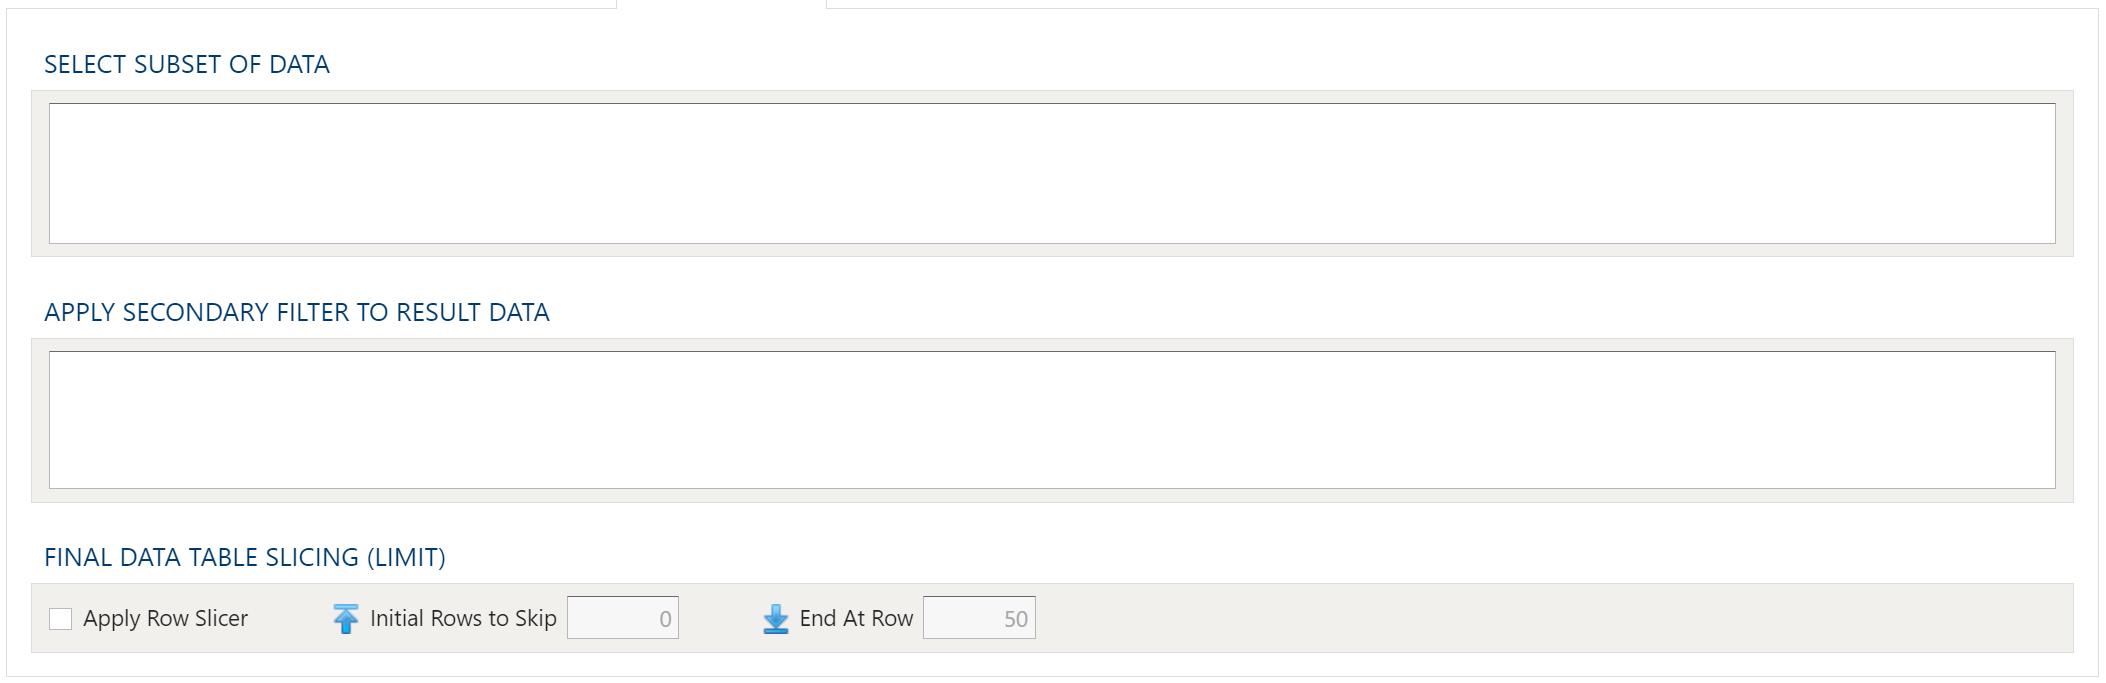
To allow for maximum flexibility, data filters are available on the source data and the target data. For larger data sets, it can be especially beneficial to filter out rows on the source so the remaining operations are performed on a smaller data set.
Select Subset Of Data
This filter type provides a way to filter the inbound source data based on the specified conditions.
Apply Secondary Filter To Result Data
This filter type provides a way to apply a filter to the post-transformed result data based on the specified conditions. The ability to apply a filter on the post-transformed result allows for exclusions based on results of complex calcuations, summarizaitons, or window functions.
Final Data Table Slicing (Limit)
The row slicing capability provides the ability to limit the rows in the result set based on a range and starting point.
Filter Syntax
The filter syntax utilizes Python SQLAlchemy which is the same syntax as other expressions.
View examples and expression functions in the Expressions area.